Adding a USB Printer
For the majority of USB printers, the process involves updating your software and subsequently connecting the printer to your Mac. If required, please install the latest printing software provided with the printer or available on the manufacturer's website.
-
Update your printer software on your Mac: Consult your printer’s manufacturer to verify if there are any updates available for your specific printer model.
-
Prepare your printer: Follow the instructions included with your printer to unpack it, install the ink or toner, and load paper. Ensure the printer is powered on and that it does not display any error messages.
- Connect your printer: Connect the USB cable to your Mac. If prompted to download new software, please ensure you download and install it.
Important: If your Mac is equipped with a single USB-C port, utilize a multiport adapter. Connect the printer first, followed by connecting a USB-C cable to a power supply to extend your Mac's battery life. For further details, refer to Using USB-C Cables with Mac.
_______________________________________________________________________________________________________________
Adding a Wi-Fi or Network Printer
If both your Mac and printer are connected to the same Wi-Fi network, the printer may already be accessible without additional setup. To verify, select File > Print, click the Printer pop-up menu, choose Other Printers or Printers & Scanners settings, and then select your printer. If your printer is not visible, you may add it manually.
-
Update your printer software on your Mac: Consult your printer’s manufacturer to check for available updates for your specific printer model.
If you possess an AirPrint printer, there is no need to check for software updates.
-
Prepare your printer: Refer to the instructions that accompanied your printer to unpack it, install ink or toner, and load paper. Ensure the printer is powered on and free of error messages.
-
Connect your printer: Adhere to the instructions provided with the printer to connect it to the network.
If you have a Wi-Fi printer, you may need to initially connect the printer to your Mac using a USB cable to set up Wi-Fi printing. After establishing the connection, install the Mac software that came with the printer and utilize the printer’s setup assistant to connect it to your Wi-Fi network. Once configured, you can disconnect the cable from both the printer and Mac, and the printer should remain connected to the Wi-Fi network. For additional guidance, refer to the Apple Support article Connecting an AirPrint Printer to a Wi-Fi Network.
-
Add the printer to your list of available printers: Access the Apple menu > System Settings, then click Printers & Scanners in the sidebar. (You may need to scroll down.)
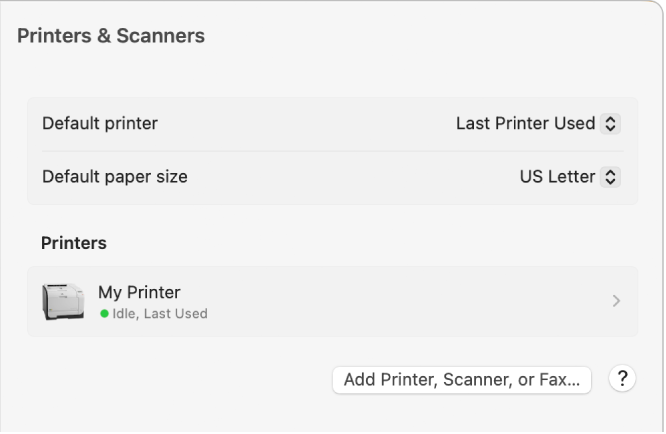
- If your printer is not listed on the left, click the Add Printer, Scanner or Fax button on the right.
A dialogue will appear listing the printers available on your local network.
- When your printer appears in the list, select it and then click Add.
Please allow a minute or two for your printer to appear. If prompted to download new software, ensure you complete the download and installation process.
________________________________________________________________________________________________________________
When adding a printer, macOS typically detects whether the printer is equipped with special accessories, such as additional paper trays, extra memory, or a duplex unit. If detection is unsuccessful, a dialogue will appear allowing you to specify these accessories. It is crucial to ensure that the settings in this dialogue accurately represent your printer’s installed accessories to fully leverage their capabilities.
Tip: You can expedite the process of adding a printer by utilizing Print Centre, accessible in the Utilities folder. When Print Centre is open, select Printer > Add Printer to configure a new printer for use. For more information, see Managing Printers and Print Jobs with Print Centre.