If you set up your new windows computer with a local account instead of a Microsoft account, one of the first things you will want to do is going to be creating a Windows Password reset disk, this is an important precaution to take, just in case you forget your password as there is no other way to reset it for a local account.
This guide will walk you through the process to create a password reset disk.
There are minor differences between Windows 10 and 11 in how you get to the place to create the disk, I will include screenshots for all the differences:
For this process the only other tool you will need besides your computer is a 16gb USB flash drive!
Accessing Control panel
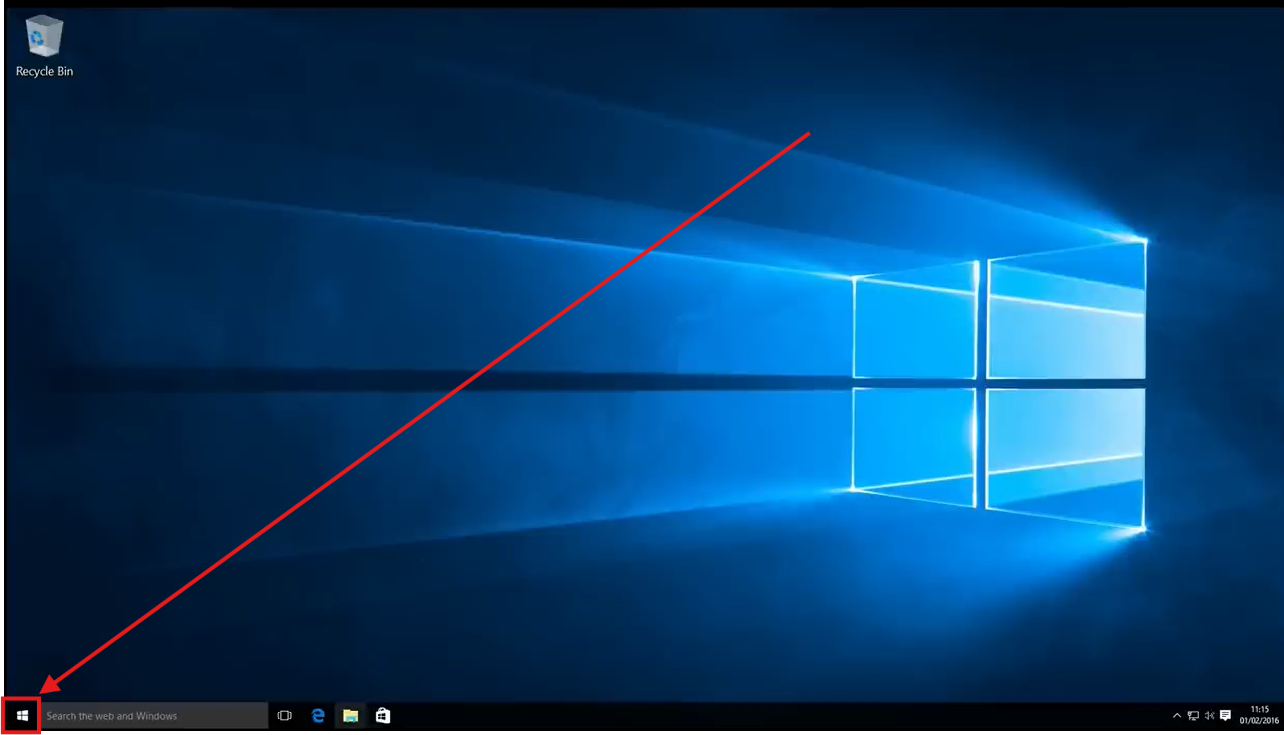
Windows 10
1. Select the Start Menu:
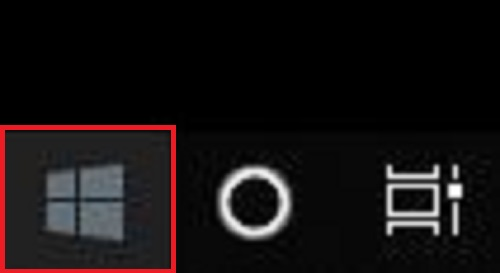
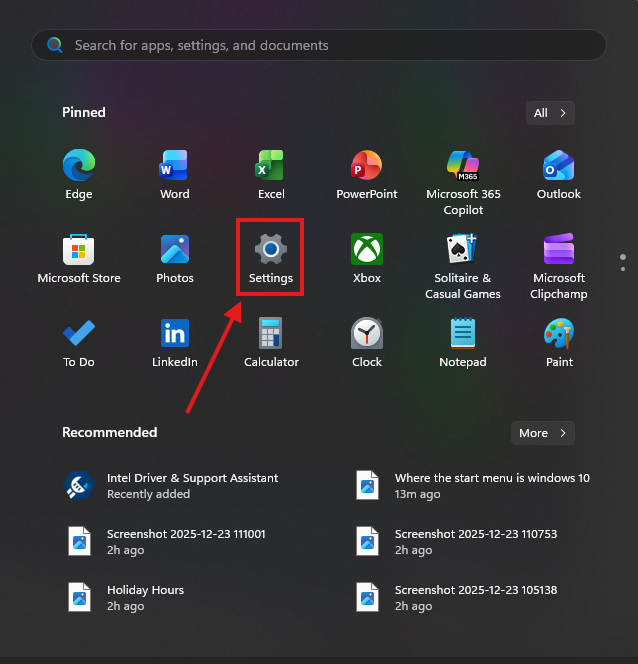
2. Click the Settings Icon, it will look like a gear:
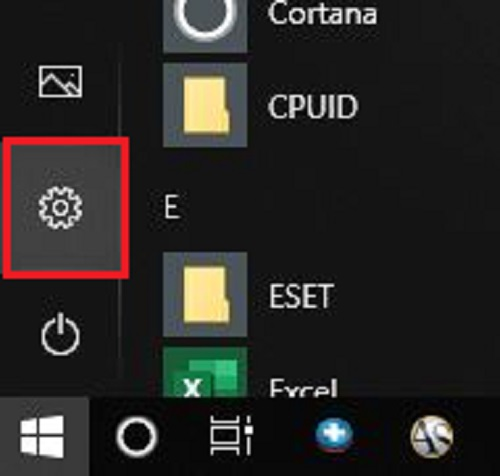
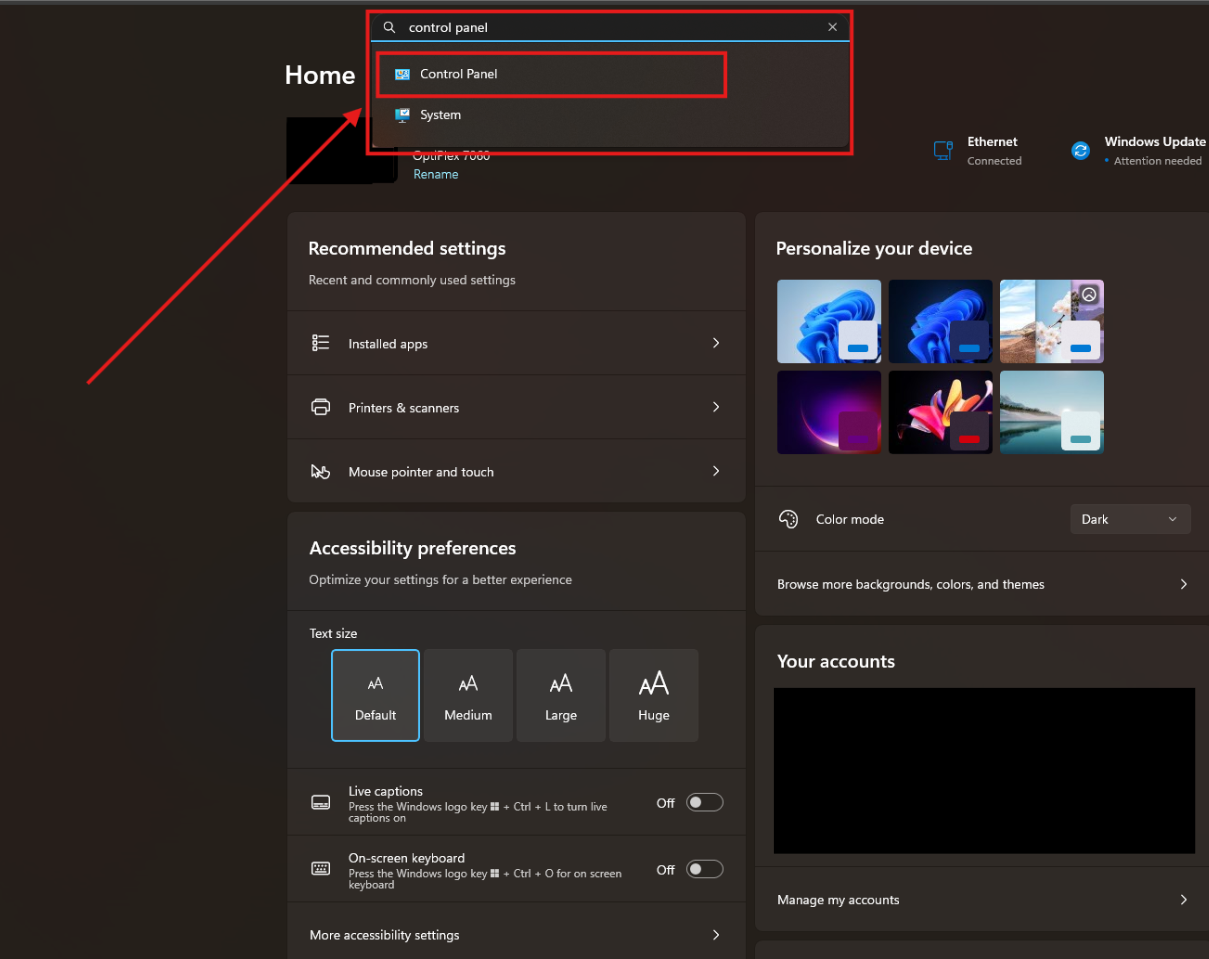
3. In the search bar in windows settings, type Control panel and select the matching option:

Windows 11
- Select the Start Menu:
![]()
2. Click the Settings Icon, it will look like a gear.
3. In the search bar at the top of the settings window type Control panel and click on the option that matches:
In Control Panel
From here the process in both Windows 10 and 11 is Identical, before we move forward, plug your flash drive into one of the USB ports on your computer if you have not already!
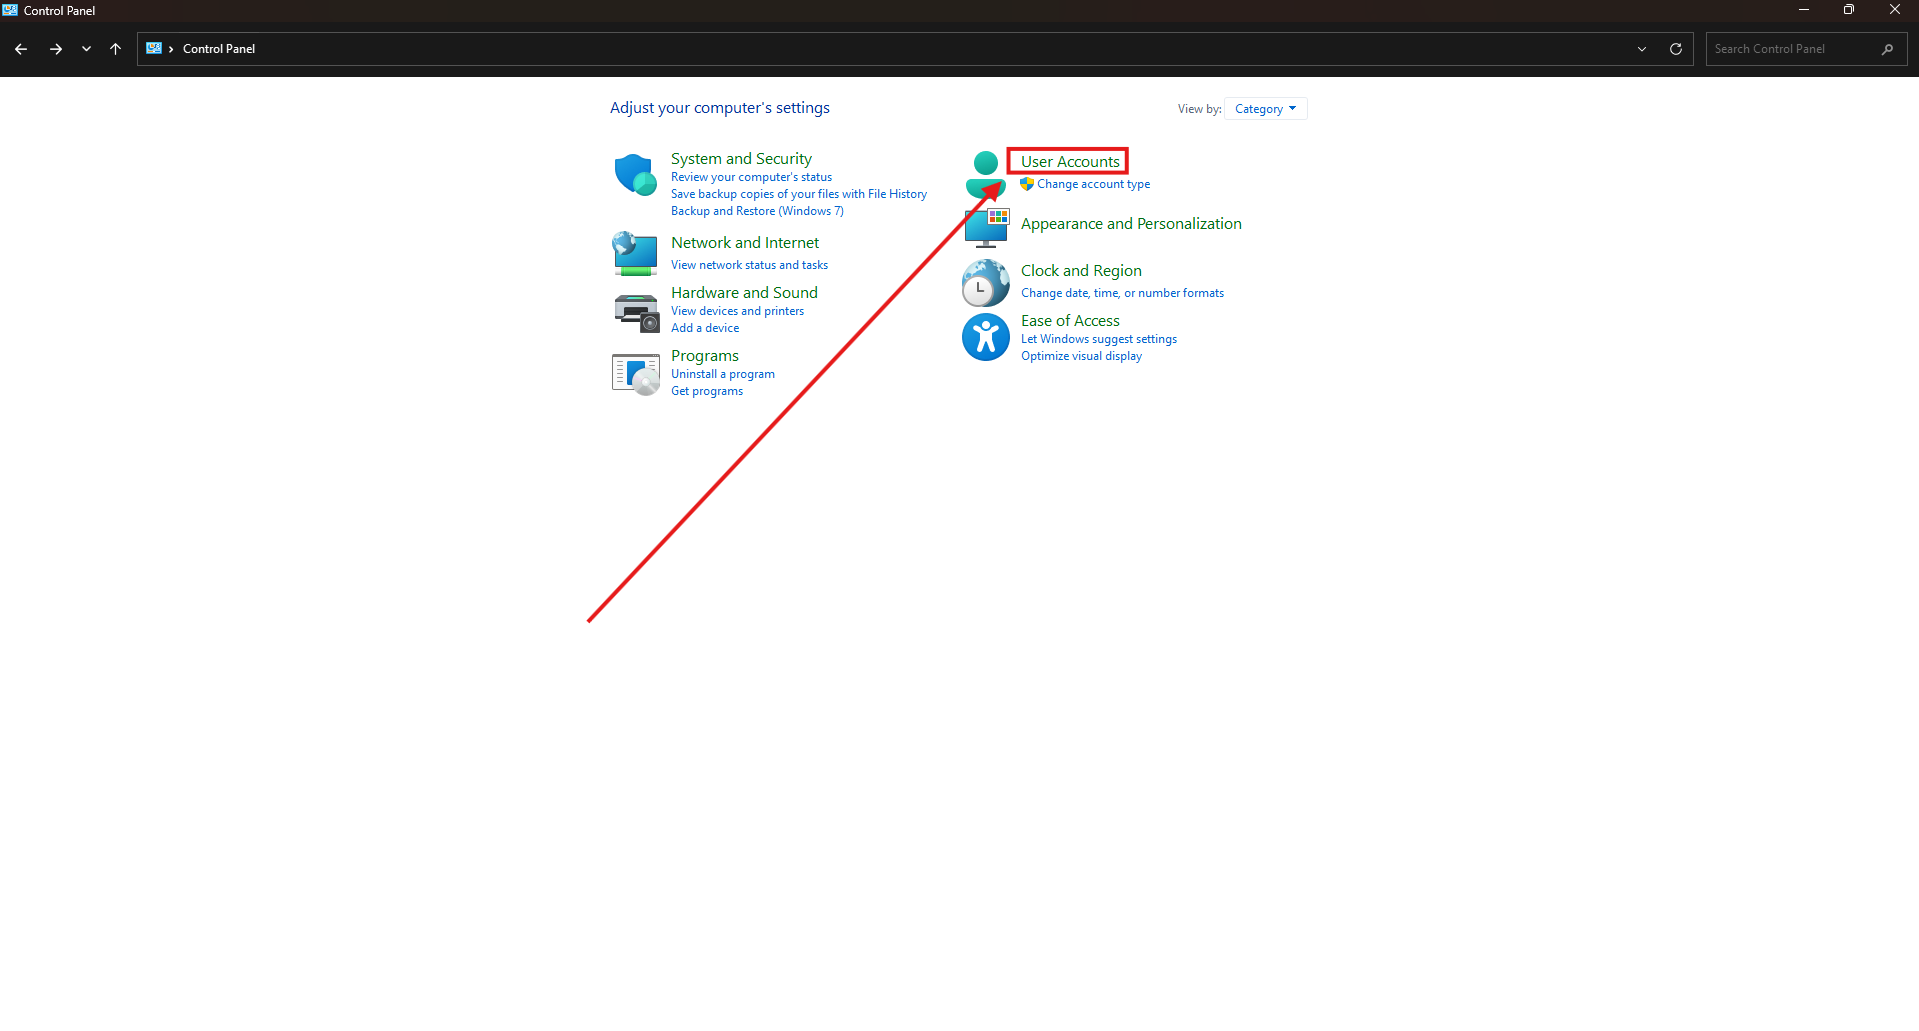
1. Click on User Accounts:
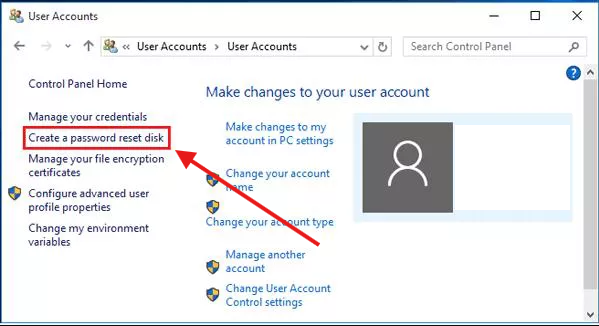
2. In the User accounts screen, click on Create password reset disk:
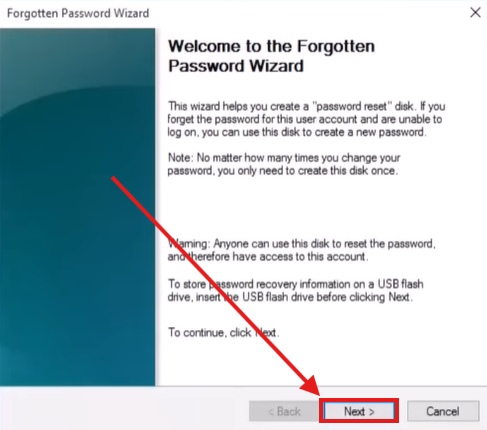
3. This will open the Forgotten Password Wizard, click Next:
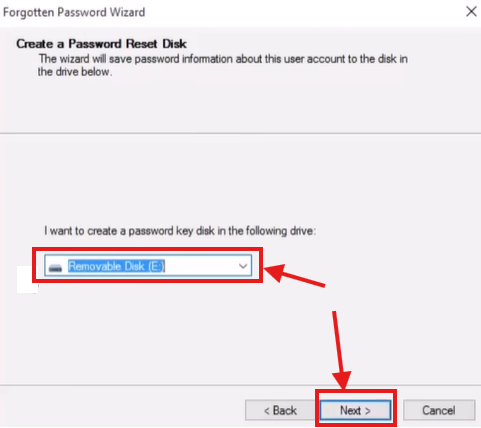
4. Select your drive from the drop down and click Next:
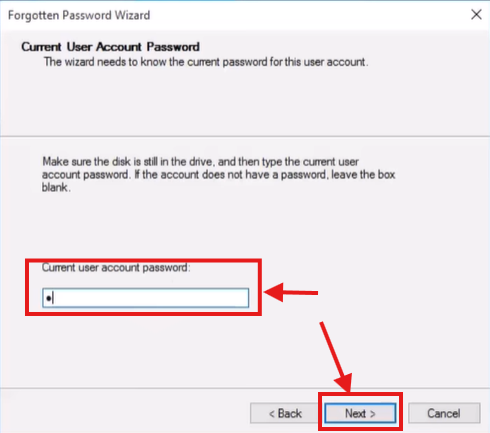
5. Put in your current password that you use to log into the computer, then click Next:
6. Your computer will start creating the Password reset disk:
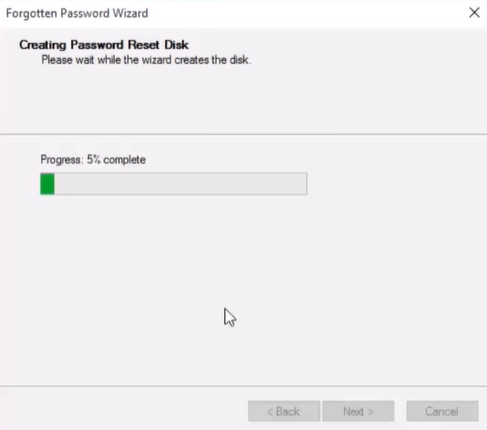
Once it is done click Next, then Finish.
7. Remove the Flash drive from your computer, Label it if you can, and store it in a safe place so you don't lose it. If you ever forget your login password, you just need to plug the USB in and click the Forgot password link below where you type the password in!